Introduction
Site creation is fast, modern and extensible with the help of Site Design and Site scripts. By using Site Design and Site scripts you can automate the custom configuration of sites across the enterprise.
- Custom scripting of sites through provisioning: This means creating list and libraries as part of the creation.
- Clean & consistently brand sites: Apply the modern theme or custom page design at the time of creation
- Apply site setting and call custom solution: We can have custom logic as part of site creating which would be MS Flow that can execute additional business logic.
Site Design is like a template. They can be used each time a new site is created to apply a consistent set of actions.Site Scripts are JSON files that specify an ordered list of actions to run when creating the new site. The actions are run in the ordered listed. Site Design “Flow”

Supported functions in Site Design creation
- Create lists/library
- Add a site navigation link
- Apply company themes
- Set a site logo
- Join a Hub site
- Trigger logic apps(using Microsoft Flow)
In this article, we are going to create a Site column, content types and use it in the list. In Site Script, each action is represented as key and value in the JSON format. Note
In a tenant, we can have 100 Site Scripts and 100 site designs. Site script actions are restricted to 300 actions or 100,000 characters.
Using PowerShell to work with site design and site scripts
Step 1 We are going to use “SharePoint Online Management Shell” to work with Site Design creation. Download and install it. Step 2 Follow the below instructions to connect to your tenant,
- $adminUPN=”<Full Email address of the Tenant Admin account>” Example: [email protected]
- $orgName=”<Name of the organization>” Example : JCC
- $userCredential = Get-Credential -UserName $adminUPN -Message “Type the password.”
- Connect-SPOService -Url https://$orgName-admin.sharepoint.com -Credential $userCredential
Step 3 Create and assign the JSON that describes the new script to a variable as shown.
- {
- “$schema”: “schema.json”,
- “actions”: [
- {
- “verb”: “applyTheme”,
- “themeName”: “Custom Cyan”
- }
- ],
- “bindata”: { },
- “version”: 1
- }
Step 4 Add the site script, at a later point we will add this Site script to Site Design. C:\> Add-SPOSiteScript -Title “Create customer tracking list” -Content $site_script -Description “Demo list for tracking customer contact information”

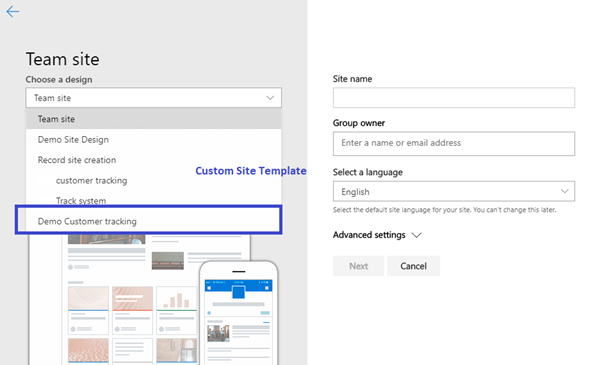
Step 5 Create a Site Design by the following script. This site design will appear in the dropdown list when we create a new site from one of the templates. C:\> Add-SPOSiteDesign -Title “Demo customer tracking” -WebTemplate “64” -SiteScripts “<ID>” -Description “Tracks key customer data in a list”

Here 64 indicates “Team Site” and 68 indicates “Communication Site” WebTemplate value helps to publish Site design Now, the custom Site Design is available when we are creating a new Team site.

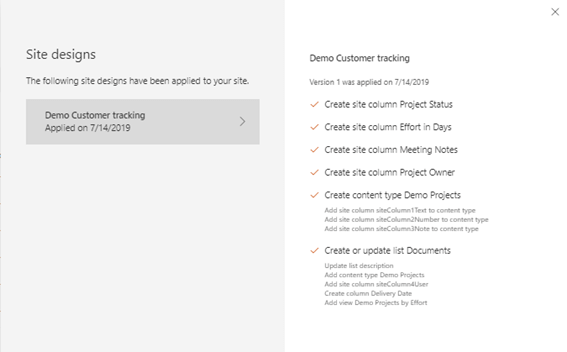
A notification bar will be displayed indicating that your script is being applied. To invoke the site design information panel, click the View progress link. Once the script(s) have completed the notification banner message will change to Site Design applied. Refresh this site to see the changes, allowing you to either invoke the panel or refresh the page.

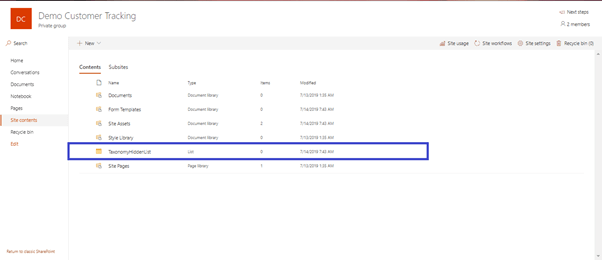
We can see the custom list with content types and site columns created in the newly created site.

